How to Upload a Stl File in Photoshop
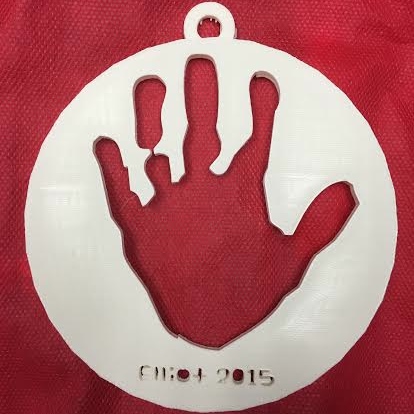
Yuletide is upon the states and Studio 304's piddling MakerBots have been hard at work printing toys, ornaments, jewelry, T-Rex skulls, cows and cheese wedges. I fifty-fifty tried my hand* at making a custom gift: an ornament embedded with my son's handprint. (*Pun completely intended.)
I bet yous have to be an proficient at 3D blueprint to make such a matter!you might exist thinking. Au contraire! Information technology turns out it'due south pretty like shooting fish in a barrel to convert a 2D image into a 3D model via Adobe Photoshop (which we have available, for gratis, in Studio 304). Allow me prove you!
Pace one: Larn a handprint. And so scan information technology.
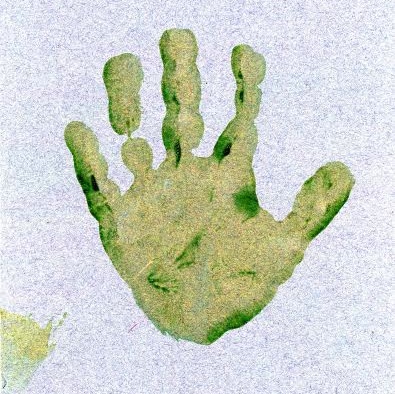
Only create a print of your child's hand (fingerpaint-on-construction paper works just fine) and scan information technology on Studio 304's flatbed scanner.
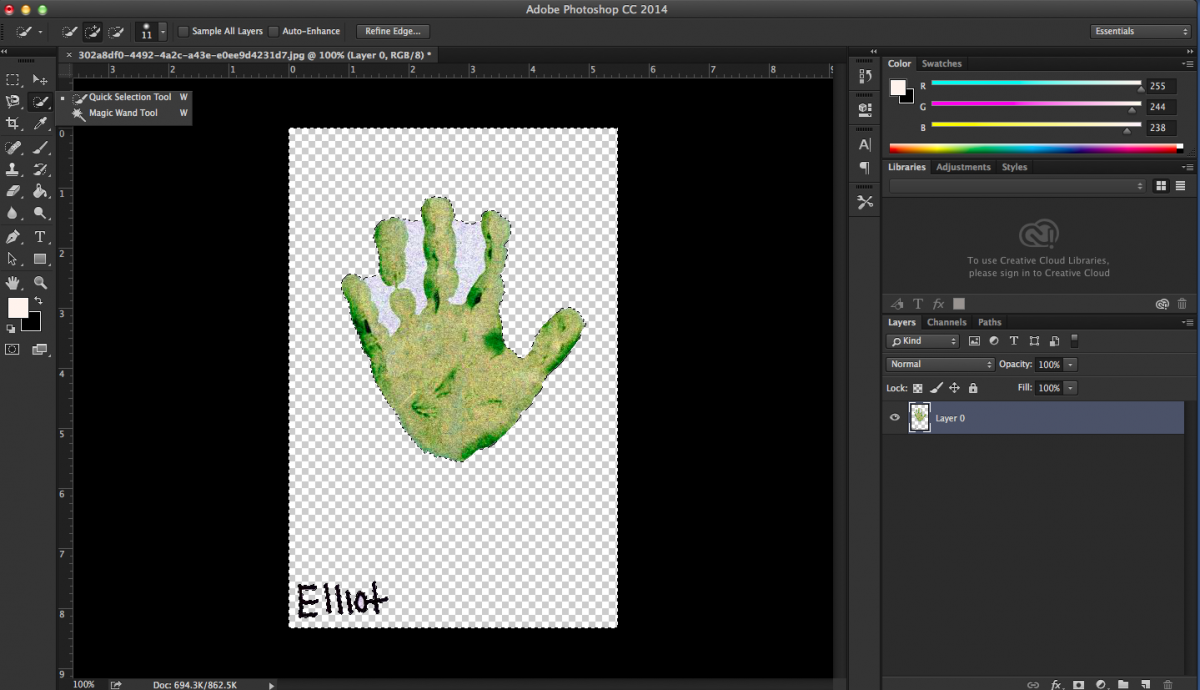
Step 2: Isolate the handprint in Adobe Photoshop.
Open the handprint browse in Photoshop. Choose the "quick choice tool" (the paintbrush with the dotted circle), and click and elevate with the mouse to select the background. Press the "delete" cardinal on the keyboard to erase the background.
(Note: You'll need to make sure the background layer, which appears on the lower correct of the screen, is "unlocked" in society to delete the background. If y'all see a padlock, click it!)
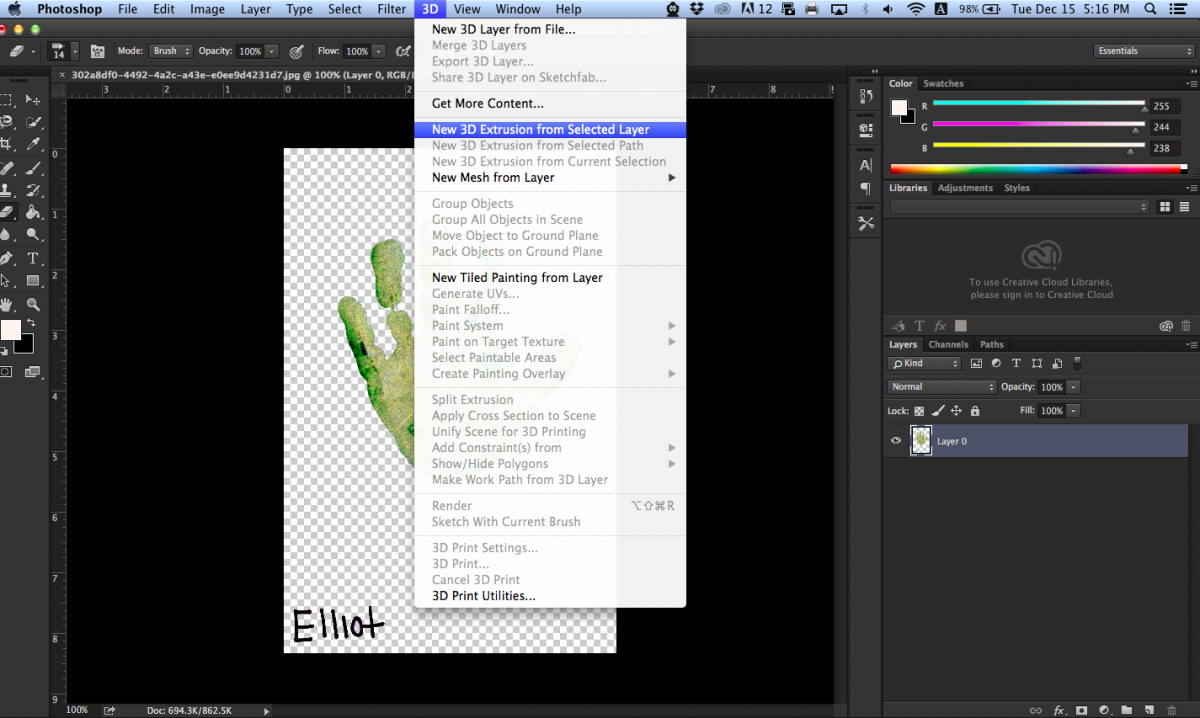
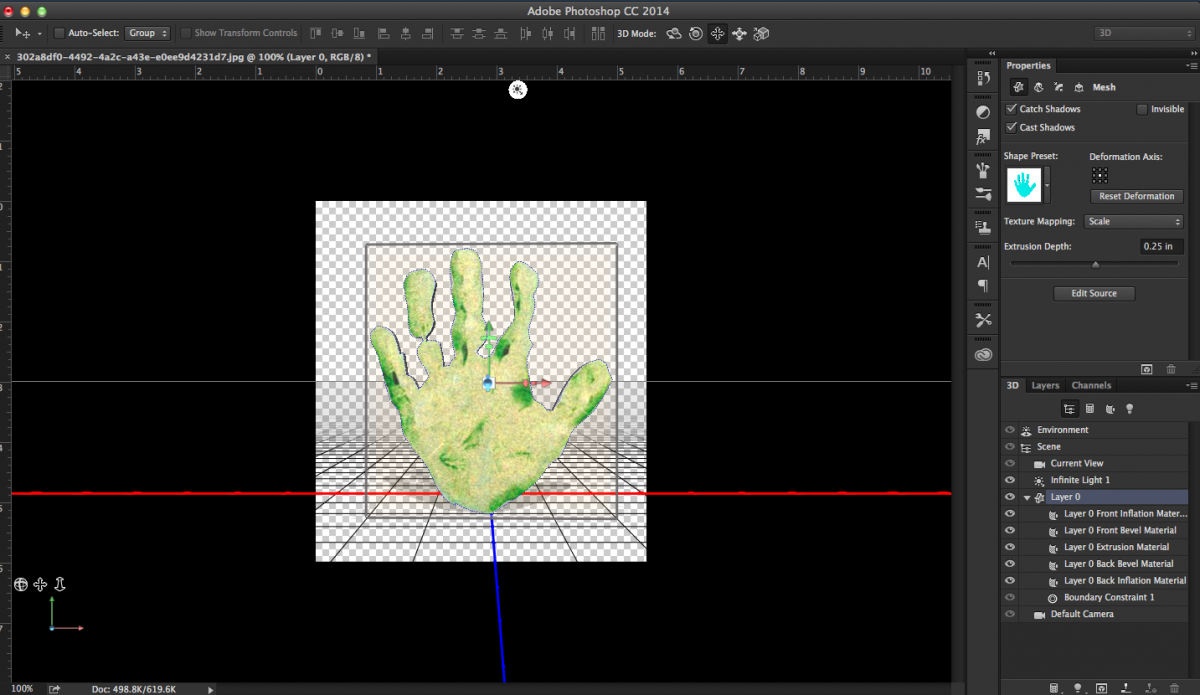
Step 3: Extrude it.
Go to 3D on the toolbar and select "New 3D Extrusion from Selected Layer." Make certain that your background layer is in fact selected (aka highlighted, as "Layer 0" is in the lower correct of this picture).
Step iv: Mod the extrusion, if necessary.
Voilà!Y'all've created a 3D model! You may need to adjust it though. This model was originally four inches thick, so I inverse the "extrusion depth" (in the properties card) to 0.25 inches.
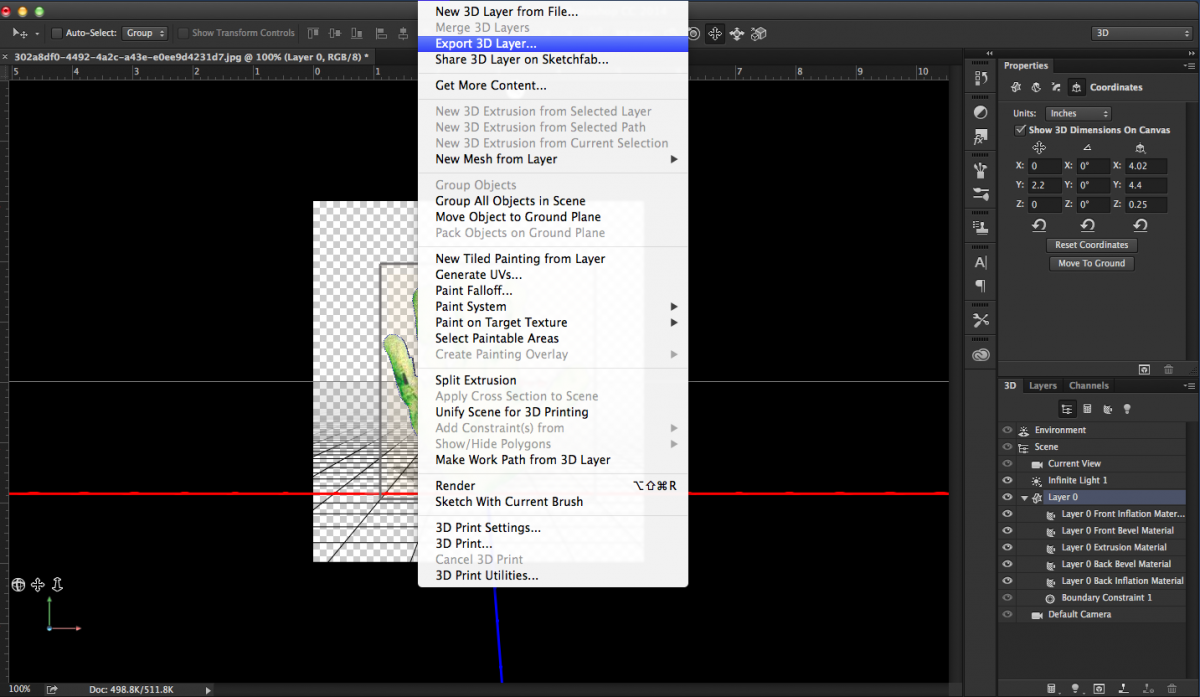
Step 4: Export the 3D Layer
Is your 3D layer formatted to your liking? Fantabulous! It's time to consign it!
Select "Consign 3D Layer" from the 3D carte du jour in the toolbar and salve your design as an .stl (stereolithography) file.
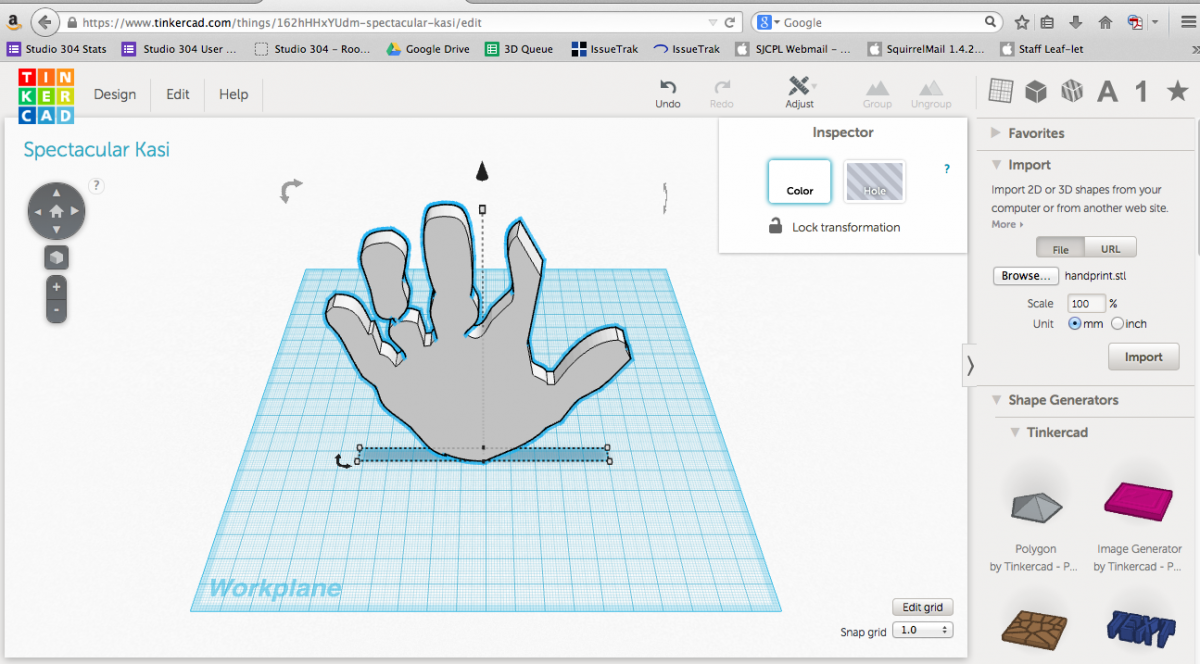
Step five: Import your .stl file into Tinkercad.
Sign into Tinkercad.com (or create an account if yous don't already have 1) and create a new blueprint. Click on Import (second choice in the correct carte), detect your file and ::drumroll:: import it.
And there it is!
Step 6: Turn your manus into a hole!
Under the "geometric" section of the menu you'll discover a cylinder. Click and drag it to your workplane then adjust the size and depth as necessary. Then take that hand and turn it into a hole! Simply select it, and click on "hole" (rather than "colour") in the inspector. Rotate it to prevarication apartment on the cylinder and nail! Yous've got a hand-shaped hole in a cylinder!

Footstep vii: Add text and a loop and… whatever else you want.
Y'all could stop correct here with the hand-in-the-cylinder if you want to, but say you lot wanted to turn this affair into an ornament. Easy! Just add together a loop by clicking and dragging a "tube" to the tiptop of your pattern. Use the "text" tool under "shape generators" (not pictured) to add text. Plow that into a hole too! Now you've got an ornamentation!
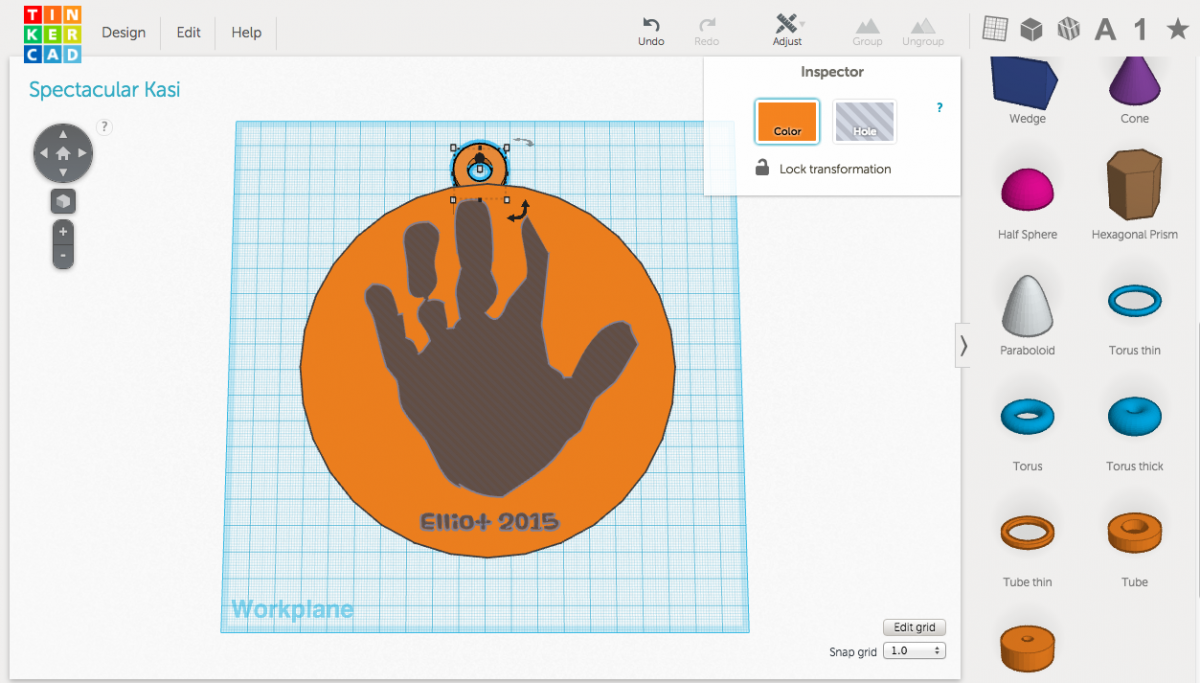
Step 8: Add together "finishing touches."
This pattern is pretty rockin' but there's one affair I'd similar to fix: The edge of E's index finger failed to come through in the extrusion. So how practise I fix this without starting over?
I know! I'll add together a "round roof" hole to the design to round out the fingertip! Boom!
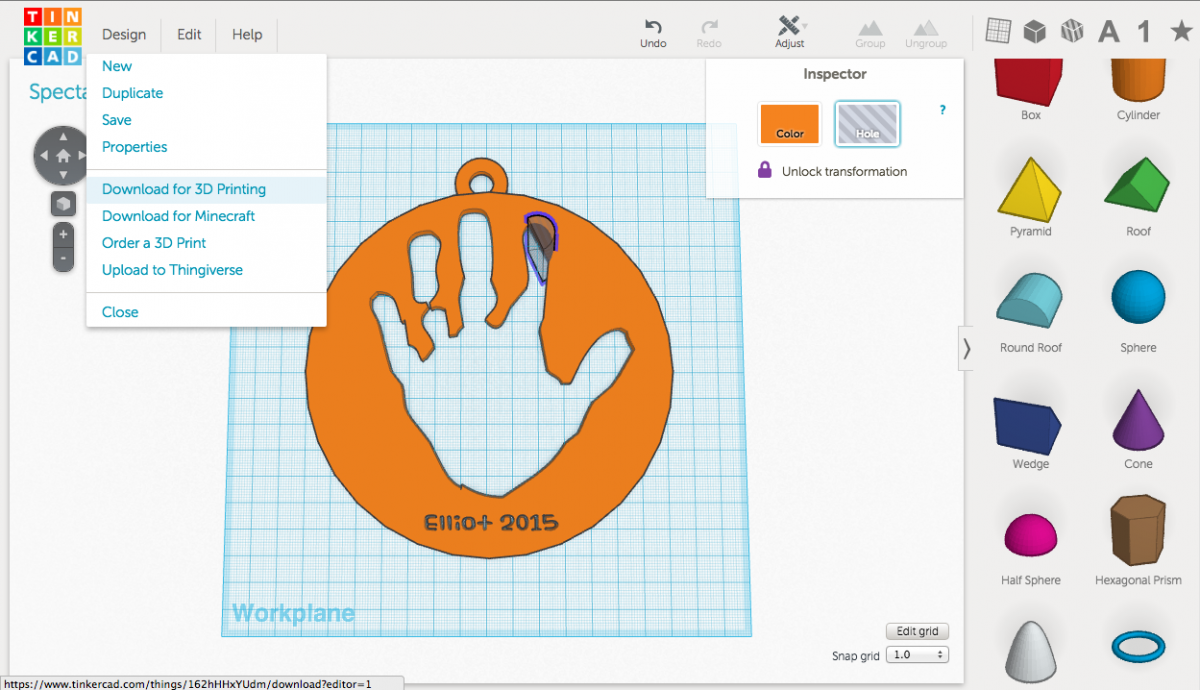
Step 9: Download for 3D press.
Click on "Pattern" on the upper left and select "Download for 3D printing." Save your design as an .stl file as before.
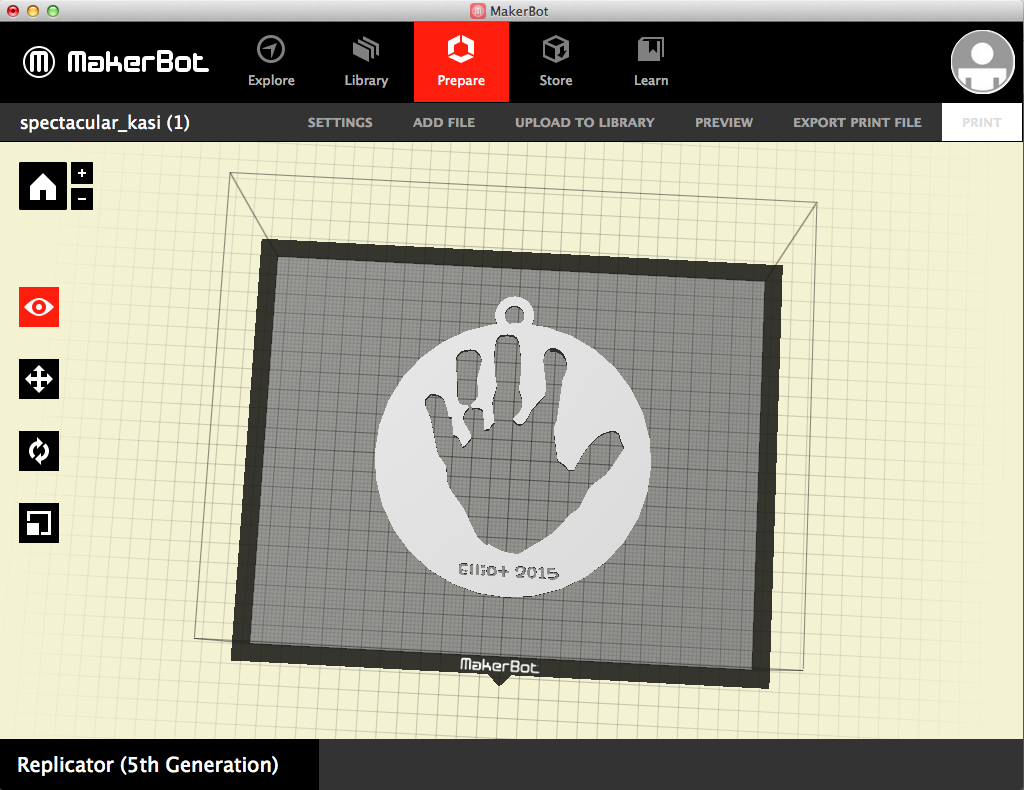
Step ten: Open in MakerBot and export the file for printing.
This is the part we'll do for you lot! Once you provide us with your .stl file, we'll export it in a format compatible with i of our MakerBot Replicators. Merely provide your file, your preferred color, and your library card number and we'll add your impress to our queue. (Psst, you don't fifty-fifty accept to come in; y'all can e-mail all of this info forth with your file to studio304@sjcpl.org.)
Prints are $0.10 per gram. At 56 grams, this handprint toll $5.60. (Though actually, a child's handprint is, as they say, priceless.)
And that's it! Now you've got a replica of your lilliputian one's handprint to give to family and friends.
Merry Holidays from Studio 304!
Source: https://sjcpl.org/tag/3d-design/
0 Response to "How to Upload a Stl File in Photoshop"
Post a Comment